Tip: Are you a non-native English speaker? I have just finished creating a
  Web App
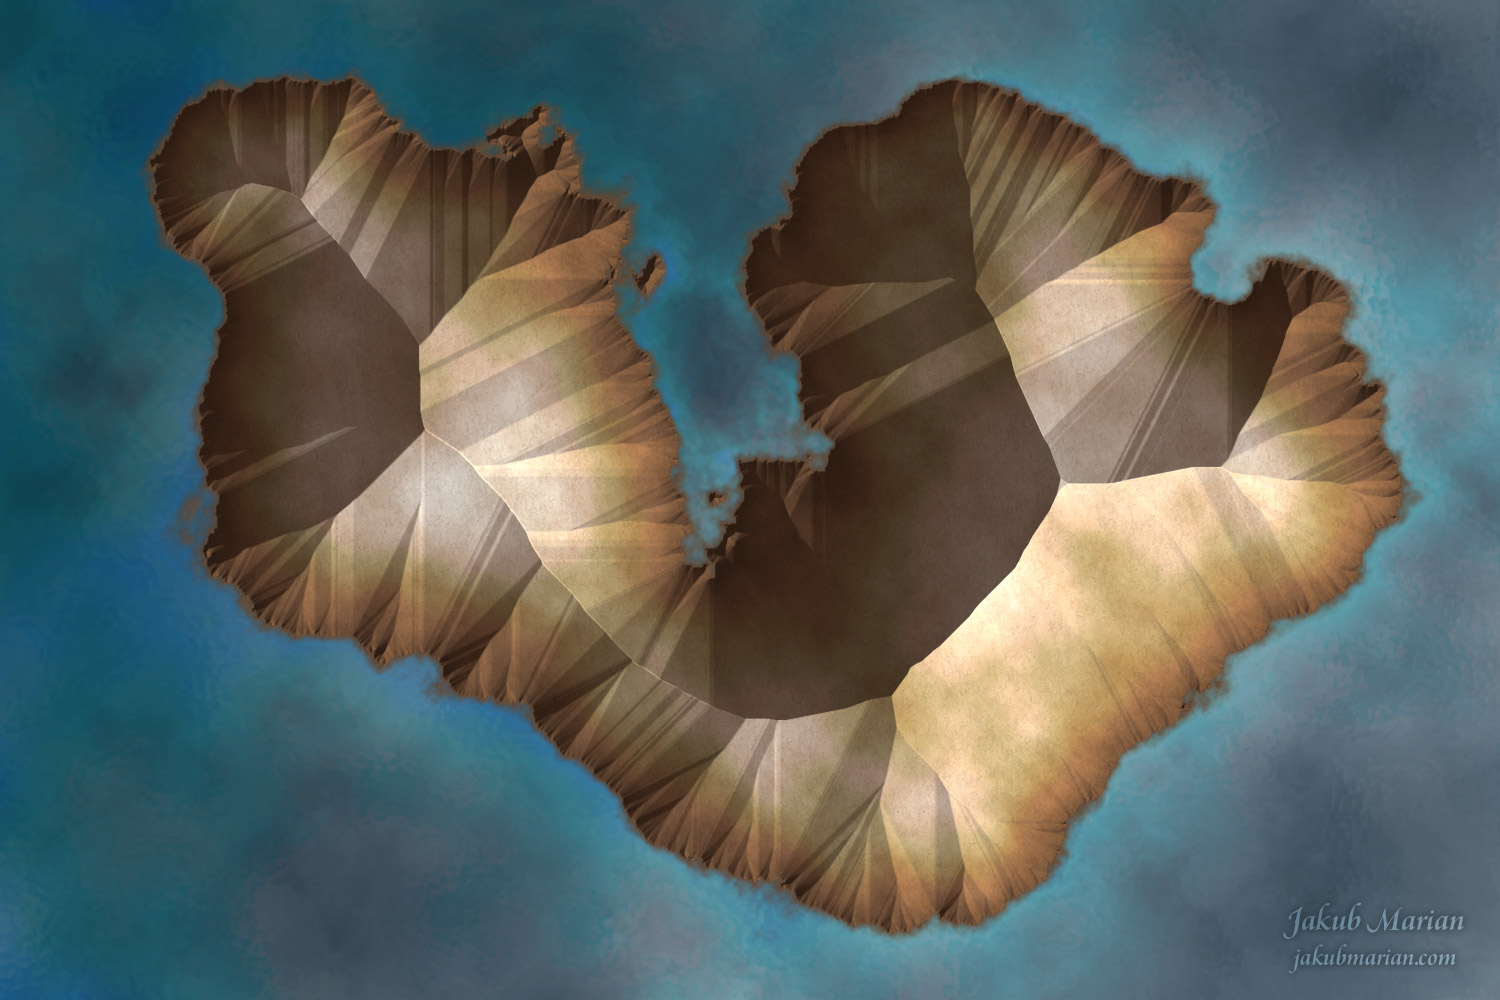
I have recently discovered a technique for drawing a relatively realistic-looking island in Photoshop, including the water that surrounds it, using just the built-in filters and layer effects in Photoshop. Here is an example:
I don’t want to write down all the details (I believe my readers will learn more if they experiment with their own settings), but here’s an outline of the process:
1) Use Filter → Render → Clouds to render black and white clouds into a new layer (make sure that your foreground and background is set to B/W). Resize the layer appropriately so that you have one white blob in the middle of the picture that could pass as an island.
2) Use the Burn tool (from the tool menu) with low exposure to darken the areas outside of the main island (make them just dark grey, not completely black).
3) Make a copy of your clouds layer. You will use one copy for the island and another one for water.
We will now work only on the island layer. I will describe a way to create the water layer in a separate article later (sorry, you’ll have to wait). So, hide one of your clouds layers and maybe fill the background layer with a blue colour to get an idea of what the result will look like.
4) Double click on your layer and go to Blending Options. At the bottom, there is this little-known feature called “Blend If” that is perfect for the purpose of isolating just the bright pixels from the picture:
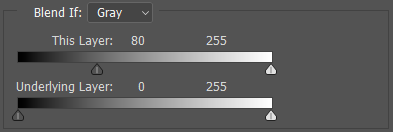
Drag the bottom slider up to a value where you like the shape of your island (pixels darker than that value will become transparent, so you’ll see the background layer, i.e. the “sea”, around your “island”). If you press alt and click on the left half of the handle, you will be able to separate it from the right half, which creates a smooth transition rather than rough edges (those are the bits that already seem to be slightly underwater in the picture above).
5) Now, we would like to apply Bevel & Emboss to give our Island a 3D look, but you will find out that simply adding the effect does not work because the layer is still the whole rectangle. The easiest way to rasterize the blending options (that I know of) is to Right Click → Convert to Smart Object and then again Right Click → Rasterize Layer. Now you have a layer consisting of just your island and transparent pixels.
6) Double click to open layer effects and go to Bevel & Emboss. As surprising as it might be, the clouds will look like rocks if you use the Chisel Hard method in the dialog. Here are the settings I used (you may want to experiment with colours and opacities after you finish the rest of your picture to make sure that everything blends together seamlessly):

7) Apply colour adjustments to your island. You will probably want to colorize your island using the Hue & Saturation adjustment option (or layer). In the picture I created, I also used Select → Colour Range to select just the strip between the “rocky bottom” and the top and gave it a slight shade of green. You may also try to add some of the built-in patterns in Photoshop to give your island a more rugged look.